Where to Get Audio pronounciation of any English word
This post is for language learner who want to master English prnounciation. In this article, there is a guidance to show you how to get any audio prounication file from Google. By downloading pronounciation file of any English word, you can practice English anytime and anywhere. I believe that and you will improve your pronounciation within short time by repitition every single word.https://ssl.gstatic.com/dictionary/static/sounds/oxford/word–_gb_1.mp3
Let’s replace the “word” in the address above with something else, which is the word you want to get the audio. For example, we can use the link above and replace the “word” with “different”
https://ssl.gstatic.com/dictionary/static/sounds/oxford/different–_gb_1.mp3After opening the link, you can play the audio again and again or download it to your phone to practice with.
Changing Accent
To change the accent from British to American, you just simply replace ““gb”” with ““us”” and vice versa.“gb”” is representative for British accent and ““us”” indicates American accent.
When you map a drive, you’re basically creating a shortcut for that drive on another computer or in another location. In other words, mapping allows you to create a new drive letter for a folder, giving you access to it just like other computer drives. Many people map their folders when they want permanent access to a folder on another computer, network, or server. Unfortunately, mapped drives don’t always work the way we want them to and some people may run into the issue of a mapped network drive that is not showing. When the drive isn’t showing, you obviously can’t open and work on it. The good news? There are a few different ways to resolve this issue. Today we’ll help teach you how to fix mapped network drive not showing in Windows 10/8/7.
Solution 1: Fix Mapped Network Drive Not Showing in File Explorer in Windows 10/8/7
If your application is running with admin rights, you may not be able to see it on your mapped drives. Here’s how to get around this:
Step 1. Click on “Start” and in the program box type in “regedit”. Click Enter.
Step 2. Find this sub-key : “HKEY_LOCAL_MACHINE\SOFTWARE\Microsoft\Windows\CurrentVersion\Policies\System” and right click it.
Step 3. Select “new” and click “DWORD value”.
Step 4. Type in “EnableLinkedConnections”. Press Enter.
Step 5. Select “EnableLinkedConnections” and right click. Choose “modify”.
Step 6. Type “1” into the value box. Click OK.
Step 7. Exit and restart your computer.
Solution 2: Fix Mapped Network Drive Not Showing All Files/Folders in Windows 10/8/7
Sometimes files, folders, and subfolders in Windows can be hidden. When this happens, users cannot see them at all, even when they go to select the appropriate drive letter. This is what happens when files or folders are hidden on the NAS drives, and it can easily happen to mapped network drives. Here’s how to unhide your mapped network drives:
In Windows 10/8:
Step 1. Open File Explorer.
Step 2. Click on the “view” tab.
Step 3. Click on the box next to “Hidden items”.
In Windows 7:
Step 1. Open File Explorer.
Step 2. Select the “Organize” tab.
Step 3. Select “Folder and search options”.
Step 4. Click on “view” tab.
Step 5. Choose “hidden files and folders” > “Show hidden files, folders, and drives” and click OK.
Once you have finished this process, all hidden drives, folders, and files should appear in their original location.
Solution 3: Recover Hidden Files when Mapped Network Drive Not Showing
If you have tried to learn how to fix mapped network drive not showing in Windows 10/8/7, but have not had any success with the methods listed above, there is a third solution that is more likely to work. It’s called AnyRecover.
1,000,000 + Downloads
Features of iMyFone AnyRecover:
Recover your data from a variety of different places including hard-drives, computers, USB and external sources, email accounts, and mapped network drives.
Search down deep into the soul of your sources to recover data, files, and folders that you may have thought were deleted forever.
Provide you with easy, simple to follow instructions that can help you recover your files, folders, and data in minutes.
Provide you with the assurance that all of your data and information is kept 100% safe and secure.
Recover data from over 1000 different source types including pictures, videos, emails, documents, and archives (to name a few).
Here’s how to use it to restore your files when network drive not showing up in Windows:
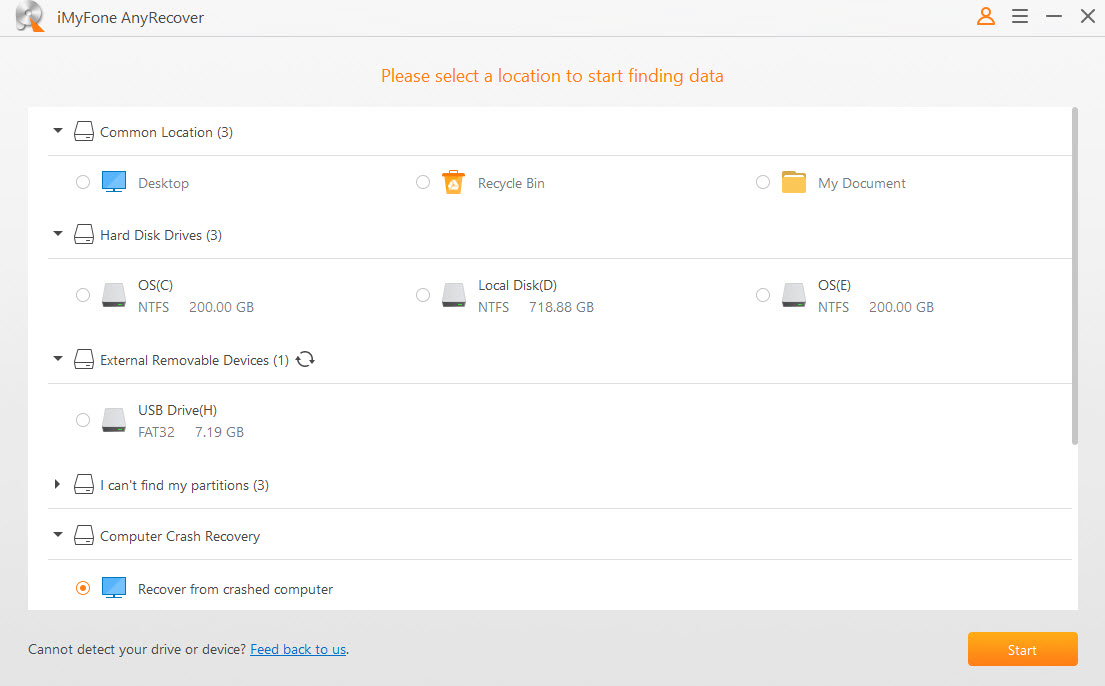
Step 1. Download and run AnyRecover software and select the network drive that you would like to restore files from.
Step 2. After selecting the location you want to recover lost data, hit “Start” button. The program will start to scan for your deleted, missing, or hidden files.
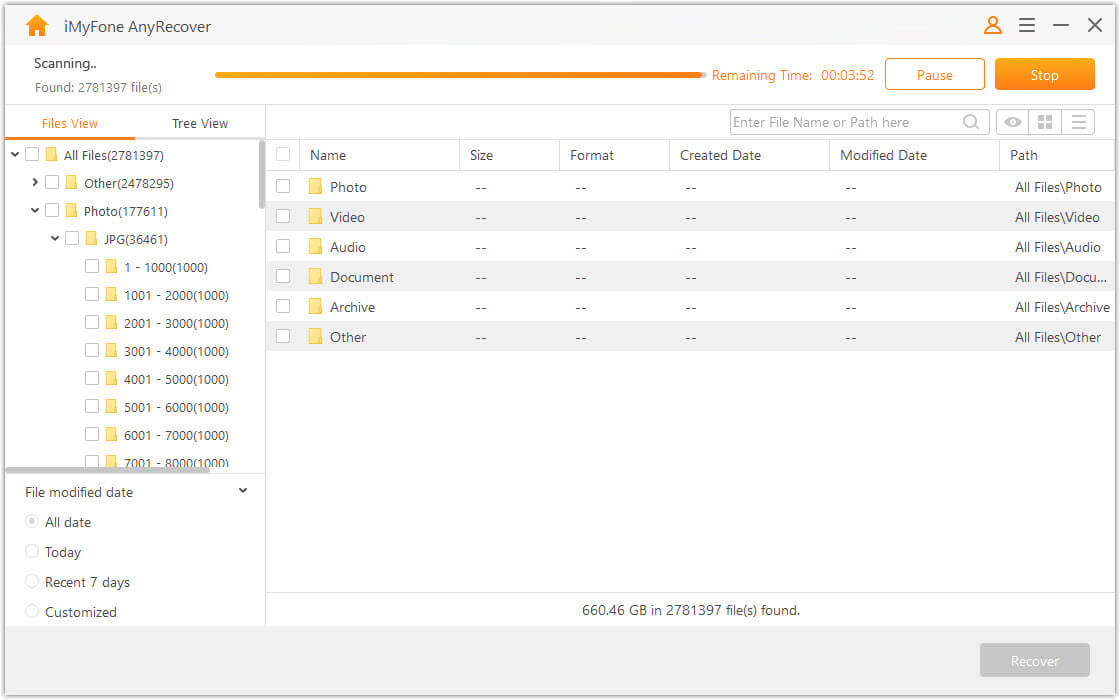
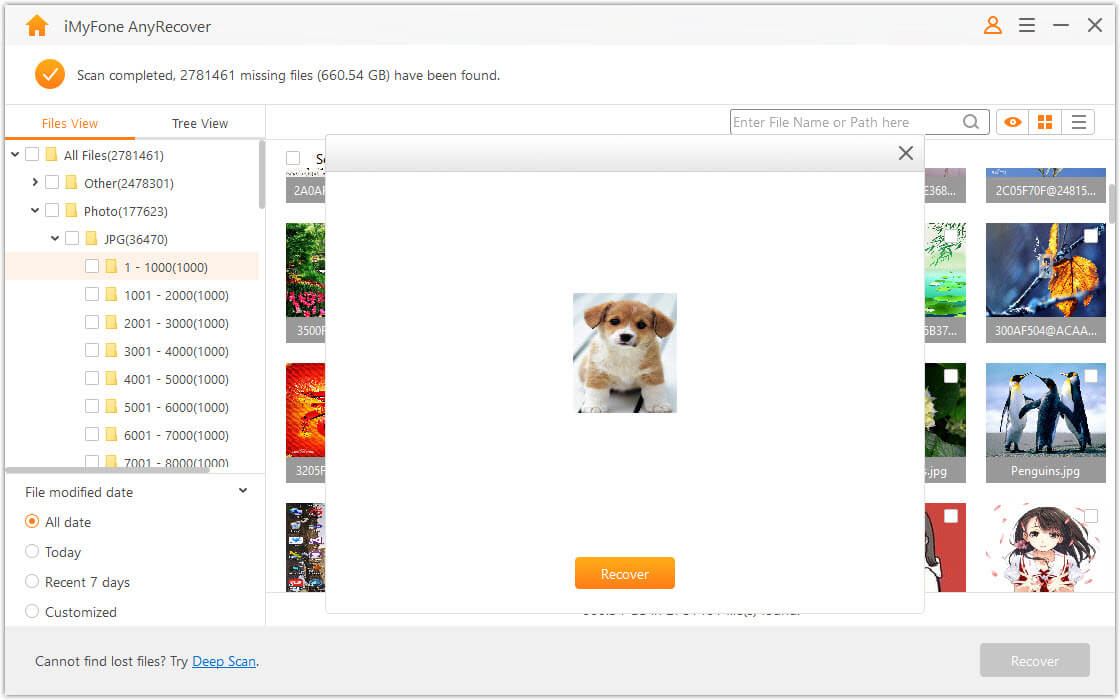
Step 3. Once finished scanning you will see a list of all your recovered files, folders, and documents. If you wish, you can preview them within the program. Select the files that you would like to restore and then click “recover” and save them to a different hard disk (aside from the original location).
And it’s that simple! In 3 easy steps you can use AnyRecover to recover your missing, hidden, or deleted files from your mapped drives.
Conclusion
If you are having a problem finding your mapped network drives, you may need to learn how to fix mapped network drive not showing in Windows 10/8/7. The first step is to try one of the first two methods listed above. If these do not work, or if you are not comfortable with following the steps, you can also try the third option – AnyRecover. AnyRecover has an extremely high success rate when it comes to recovering data, even after it has been “permanently” deleted.
If the network connection type is set to Public, enabling PowerShell remoting might fail because by default, PowerShell expects domain or private connection types.
If you try to enable PowerShell remoting on a PowerShell console with Enable-PSRemoting ‑Force, you will sometimes receive the error message below:
Set-WSManQuickConfig : … WinRM firewall exception will not work since one of the network connection types on this machine is set to Public. Change the network connection type to either Domain or Private and try again. … The reason is that the computer will allow connections with other devices in the same network if the network connection type is Public. Microsoft considers it as a security risk if you enable PowerShell remoting in a Public network.
You can verify your current connection type settings in the Control Panel: Control Panel\Network and Internet\Network and Sharing Center
Viewing networking connection type in the Control Panel
You can also check your profile settings with the PowerShell cmdlet Get-NetConnectionProfile. The NetworkCategory property corresponds to the network connection type.
Displaying the network connection type with PowerShell
This problem can even occur if your computer is an Active Directory member. If you’ve previously signed on to the member machine, Windows will cache your credentials, and you can log on without an available domain controller. In that case, Windows will automatically set your connection type to Public.
If a domain controller has authenticated you, it will set the network category to DomainAuthenticated:
In this case, PowerShell won’t throw an error if you enable remoting. However, if a domain controller hasn’t authenticated your computer, you have two options.
With the SkipNetworkProfileCheck parameter, you can just ignore the warning:
1
Enable-PSRemoting -SkipNetworkProfileCheck -Force
The Force parameter avoids the confirmation prompt.
Using the SkipNetworkProfileCheck parameter
Changing the network connection type with PowerShell ^
However, this option poses a security risk because Windows enables network discovery features for your computer. Thus, it is better to change the connection type manually to Private:
1
Set-NetConnectionProfile -NetworkCategory Private
Changing the network connection type to private
Notice that you can’t set the NetworkCategory property to DomainAuthenticated. If you try, PowerShell will return an error:
Set-NetConnectionProfile : Unable to set NetworkCategory to ‘DomainAuthenticated’. This NetworkCategory type will be set automatically when authenticated to a domain network.
So many year I had been in computer line, dealing with computer hack (virus infection) and crash, I feel that the best solution to these problems is backup.
Try and keep at least a copy of your backup elsewhere. If there is anything happen to your system you can easily reload and transfer data back to system to start everything again.
Without backup basically you will be facing lost of data and unable to continue your work.
There are several way of backup, one is to make use of the technology like dropbox to keep on the important thing, or make use of Google drive or Hotmail skydrive.
There are even third party cloud solution like sugarsync which offer a good amount of space for backup. There are other around as well. (Maybe i will write some articles on those if i am free).
Another other backup method are setting up your own cloud like WD Live Duo which offer a good platform for your backup and have a RAID as addidtion protection of you data. Or you can use the Netgear ReadyNAS DUO or Buffalo LinkStation as your backup. Anything is better then none.
The other form is just to buy a portable hard drive which should be bigger then your system and perform backup onto the portable hard drive. This is also good as you can carry along or store it in a safe location.
Alternative if you have two system try backing up one system data to another and another system data to this by creating a share on both system. So if there is any problem with either one you will still have a copy of backup laying on the other system.
One other form is to burn into CD or DVD rom. Or copy onto USB flash drive.